Showing posts with label journal. Show all posts

Saturday, January 19, 2013

Journaling Washi Tape and Zentangle Inspired Art

I had such a good time and liked the results of tangleing over the scraped on paint in my journal (see previous post) that I decided to do another page.
Sooooo - I chose a page with green acrylic paint wiped off on it and drew a few pears.


Then I tangled inside the pears.  I was going to tangle a border but thought it might be too heavy and distract from the pears.  Then I remembered my latest and one of my favorite washi tapes of pears.  Perfect!  So I used that and a couple other green washi tapes to make a border.
Here's the finished journal page:

You can learn all about Zentangle and the creative people that started this trend by checking out their website Zentangle.com by clicking HERE.

Thanks for taking a look!
Hope you have a creative weekend!

Wednesday, January 16, 2013

Journaling Zentangle Inspired Art


 that I've been using to use up leftover paint, or ink on stencils.  The cover looks like this:

And the pages I used to use up leftover paint and sprays look like this:


 SEI Tumble dye on a Crafters Workshop stencil.  You get the reversed image when using up the ink left on the stencil.
 Acrylic Paint.
Here's a tangle I started on a page with some acrylic paint wiped off on it.
This is the completed tangle.  Designs were inspired by patterns and gallery examples in the following Zentange Books.

Joy of Zentangle  - you can check it out on Amazon by clicking HERE.
This book has 101 patterns to learn and use.  Plus lot's of great Zentangle examples to inspire.

and

Zentangle Untangled - you can check it out by clicking HERE.
This book has about 12 Zentangle patterns but lot's of info and great examples to inspire.

You can learn all about Zentangle and the creative people that started this trend by checking out their website Zentangle.com by clicking HERE.

It's alot of fun and very relaxing if you let yourself give it a try and truly enjoy.  You don't have to be creative - just need the desire to relax and let it stop all the thoughts flying around in your head!
Works for me!

Enjoy!
Thanks for taking a look.

Sunday, October 21, 2012

New Composition Book Journal

I recently started a new journal.  This one I'm going to devote to one of my favorite things - OWLS.

I'm using a Composition notebook I got a couple months ago during back to school supply sales..


I'll decorate the cover farther along in the process when inspiration for the cover strikes me.  I've been gluing pages together (I use a good glue stick and put glue on both pages before pressing together) and gessoing pages in preperation for creating.  I've also put a few pockets in the book usung washi tape.


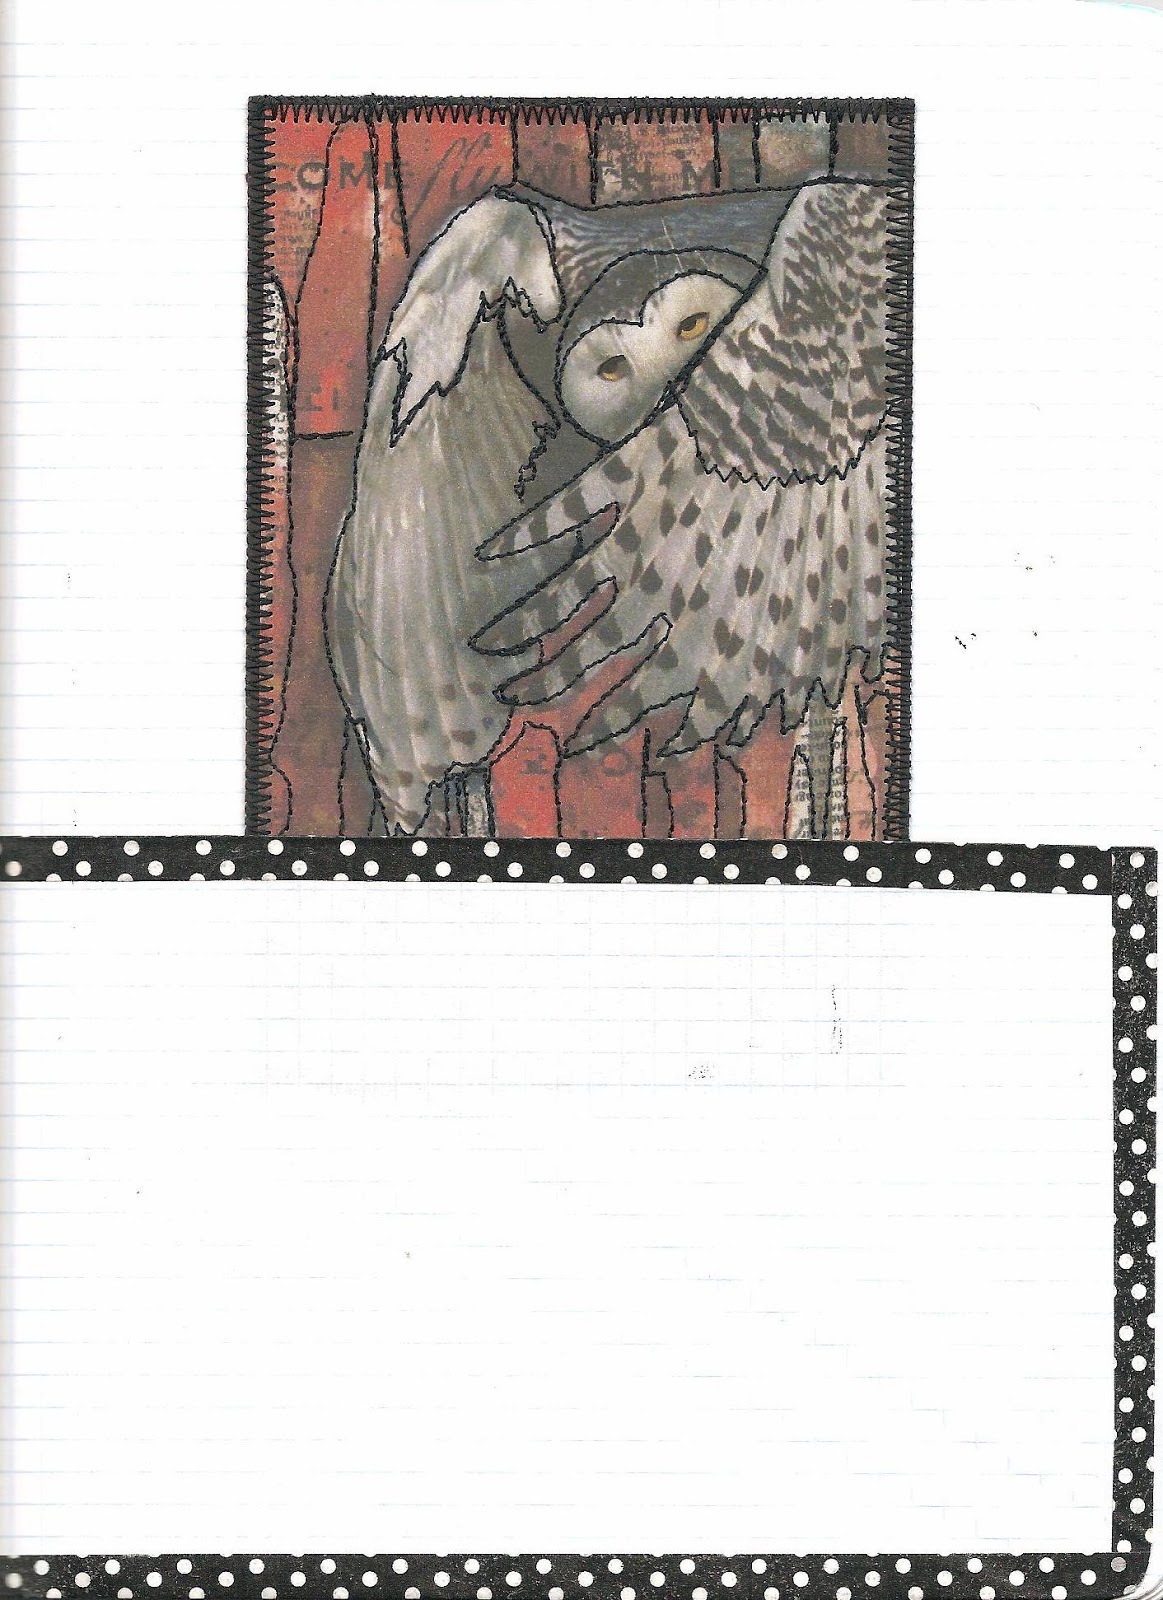
The first page has a pocket holding very special postcard my friend Barb sent me.


The postcard is made from a series of collages Barb was doing and posting on her blog HERE.   I loved the owl so much I asked to trade her postcards.  Here's her postcard front and back, as well as the ATC she created to tuck in the belly band she put on back of postcard:


The last image I have to share with you today is a journal page I did using one of my favorite owl quotes.  The background was done with watercolor pencils.  The owl image is cut out from a catalog (I believe it was Pottery Barn).  The letters were printed out on white cardstock, cut out and edged with ink.  All were glued in place with a glue stick.  Last step was to cover with Golden Matte Medium.  In between the phrases looked like too much space, so I found a brown pen and added some scribbles.

  
Thanks for taking a look!

Saturday, October 29, 2011

Lilies

Here's my latest journal page:

The background is sprayed with a homemade spray I made with reinkers.  All the pieces are glued down with matte medium (I used Daniel Smith brand, you can\find it here) .  The very back paper is some round ephemera pieces I have, I cut it half and glue the pieces down, then adhered the lilies magazine image I had fussy cut.  The leaf is an actual leaf I had dried between the pages of a book.  "LILIES" is hand written with a Sharpie® pen on a scrap of watercolor paper I painted Lime Green.  And the text is hand stamped (a Printworks rubber stamp).  How appropriate as what has a more wonderful fragrance than Lovely Lilies?!?
Thanks for taking a look!
I hope you are having a CREATIVE weekend!

Wednesday, October 26, 2011

Magnolia Journal page

Magnolias are one of my favorite flowers.  Awhile back I got a card from a friend that she had made with a magnolia she had put on the front.  A day or two later I got a card from another friend and she had used a Magnolia postage stamp to send it.  Then while out and about I had gone to an antique store that had a painting of a magnolia very similar to the one on the card that had a black background.  A journal page inspiration/idea started building in my head!
Heres' what I came up with:
I painted the background with layers of gesso, black acrylic, and dark green acrylic.  Then I used a Tattered Angels mask for the fence and used a makeup sponge to sponge two shades of green acrylic.  I used another mask and two shades of green again for the mask in the upper left corner.
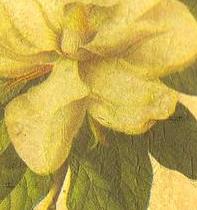
I toned down the white on the postage stamp with green ink and also, edged the magnolia image I had torn off the card with the same green ink.  The page needed one more thing, I looked through a bunch of magazines and found the center image.  Everything was glued down with matte medium.  The magnolia from the card got a sort of cool texture, almost crackled.  Here's a close-up you can sorta see the texture:
  Cool, huh?
Here's a close-up of the masking also:
I really like how it turned out with the two shades of green.


Thanks for taking a look!
Enjoy the rest of your week!

Monday, October 24, 2011

Ok, I'm ready for the REWARD!

Here's a journal page I made based on a fortune cookie fortune "Your path will be difficult but will be rewarding".
When I got the fortune my first thought was that it would be great for a journal page.  I've had it sitting on my art table for awhile.  While looking through ALL the stuff I'm saving for collage and trying to organize it I came across this winding river image I've been saving for just the right thing.  The two just seemed to go together!
The background is acrylics - maroon, white, and a drop of ultramarine blue.  They are blended and spread around with a palette knife.  I printed the words out on card stock.  I edged everything with an olive green ink pad to grunge it up a bit.  Everything was glued down and sealed with acrylic matte medium.
I put and extra REWARDING at the bottom for good measure.
Bring on the rewarding part!
Thanks for taking a look!
Now - go do something creative!

Saturday, July 9, 2011

Get Your Art On - days 4,5,6,7, & 8

Okay, finally time to post some more Get Your Art On days!  Blogging is definately going to be the challenging part of this for me.
Day 4
Decided the Tim Holtz die cut gears would make great fireworks.  Kinda difficult to see on the scan but made them sparkly by gluing on sparkly bits and glitter glue.
Day 5 and 7
I worked on these pages Tues and Thurs and forgot to scan in between.  Now I'm trying to be sure to scan what I did that day each night, whether done or not.  They are in my Bird Altered Book.


Day 6
I had alot of appts and errands this day and was pretty worn out when I got home.  My art for this day was art preparation.  Time to recycle some magazines so went through cutting out words, phrases, and images.
Here's a few words:

And a few images:

They'll end up in some fun collages one of these days.

Day 8

This is a journal page inspired by song lyrics:
I'll put the lyrics on the opposite page of my journal.  I don't know how I ever found this song and lyrics cuz it's not my usual style of music.  Just goes to show...step out of your usual now and then, might find something you really like!  You can check out the song on YouTube HERE.

Today's Get Your Art On is outside drying and not done yet so it'll get posted another day.
You can read all about 30 Days of Get Your Art On HERE.
Join in!  You can start your 30 days at any time!
Thanks to Traci Bunkers for the inspiration!

Have a GREAT weekend!

Saturday, July 2, 2011

Island Hopping, Aloha and Passion Flower

Seems I've been more into art journaling than blogging lately, so, have a little catching up to do.

I've been hanging out in semi-sunny Oregon making journal pages about Hawaii.  My mom and a couple cousins are planning a trip to Hawaii that is coming up soon.  I like their approach to the whole Hawaii theme!  But a trip there is not in the stars for me right now...maybe another year.

Here's the first page, titled Island Hopping:    

The background is iridescent acrylic paints and Color Wash.  The white strip is decorative tape (which I had to get as it has one of my fav tropical leaves and a Sea Turtle-I adore Sea Turtles-on it).  The maps of the Islands are images I got off Google.  The full image of Hawaii is a postcard I made from the front of a  tablet I got in Hawaii.  I've also stamped some tropical images here and there.
And, as you can see in the following image, the postcard flips up the reveal the Island Hopping title and a stamped postoid of the state fish of Hawaii, although I did take it upon my artistic self to alter the colors.  And, as you can see the opposite side of the postcard shows a Hawaiian scene with palm trees and a hammock I wish was outside my door!
Next is a page I made from an ad I saw in a magazine the other day.   The background is again iridescent acrylic and Color Wash.
I tore the main image out, then tore strips from around the edges.  Usually I would color the white edges but in this case I really like the way they look left white. Before I glued the image of the surfer down I stamped the wave 3 times with acrylic paint.  I had the letters left from a set of grungeboard letters and I painted them white with a Ranger dauber bottle of acrylic paint.  Then glued them down.  Last thing was to put a Hawaii postage stamp on white cardstock and then cut out with postal decorative scissors.
And, Voila!  It was done!

The last page is one I made using an image from the cover of a catalog that I have been saving since 1997.  Yep, I said 1997!  I was surprised when I saw the date on it...whoa was that ever TREASURING!

I made the background using two shades of green acrylic paint.
Then, using a technique I learned from DeDe of Inkwell Studios I tore the image out, glued it down with gel medium (it wrinkled more than usual-I think I got it too wet...).  Then went back with the 2 shades of green acrylic and painted around the edges.  Alot easier than fussy cutting - I think that's what had me treasuring this picture all those years.  No way I could cut around all those stamens or whatever they are.  Then I drew the letters on with pencil, painted them with acrylic, then outlined in black with a Sharpie pen.
I still need to do a little touch up where the torn edge is but wanted to post it here before I move on.
Dede's blog can be seen HERE.  She is an amazing artist and shares so much knowledge on her UStream shows.  You can find the link to those on her blog.  She is alot of fun to watch!

Thanks for taking a look!
Hope all my Canada friends had a wonderful Canada Day!
And hope all of us enjoy the Fourth of July weekend!

Go create something!

Friday, June 17, 2011

Stencilage Journal Pages

I've been having a lot of fun playing with stencils.  They are especially fun to use with some of the sprays out now - Glimmer Mists and Color Washes are a couple.  Stencils are also fun to play with with spouncers or foam brushes and paint or ink.

My very talented friend, Paula, aka Journal Artista, is hosting a contest and will be giving away some Crafter Workshop stencils.  To be eligible to be in the drawing for a stencil you need to make some art using a stencil and share a link to it on her blog Linky.  You can read all about it on her blog HERE.

Back to the fun I've been having...here's a page I finished today:
The background is all craft acrylic paints,  The design in the upper left corner and lower right corner were made with a Tattered Angels stencil.  I kinda grunged them up with some extra paint and Color Wash spray.  Decorated the background with dots made with pencil eraser, circle made with rx bottle and some stenciled flowers with a stencil I made with the Tim Holtz Alterations Tattered Florals die.  I never completely plan my journal pages, kinda let them evolve as I go.  And this time I had some die cut flowers laying around on my art table, as well as a couple scraps of colorful watercolor paper.  I liked how the bright colors looked with the dark blue so played around with placement and glued stuff down with matte medium.  Looked through a list I keep of words and quotes to use in my journal someday and decided "If not now, when?" was a good choice.

Guess maybe I use prompts backwards...most people pick a prompt, then do the art.  I sometimes know what I want to say on the page, but usually I do the art and then decide what it's saying to me.

I'm really liking that Tattered Florals die.  Here's some more stenciling with it:

And still more:
These both came about with what us Journal Artista Ustream friends call Paulaisms.  "Use what is around you on your art table".  Probably not her exact words but close.

For the gold and blue page I was painting book pages with watercolors and then die cutting the flowers.  After cutting out the yellow ones I set the leftover paper aside and it was on top of the book page I had painted blue.  Looked pretty cool!  So an idea was born!  I painted the gold background, glued the blue page down, then the yellow.  Looked sort of plain so added some cut out flowers.  Still needed something so used some of the die scrap as stencils abd sprayed with bright blue spray I made by mixing Glacier Glimmer Mist with some bright blue Memories reinker ink.  

I used matte medium for gluing down all the pieces on these pages.

The green page started out as a background page I was going to post to show the stencils.  In addition to the flowers I also used sequin waste (or also called Punchinella) to stencil the dots.  I did that first, then put the flowers down and sprayed over them with Color Wash.  (fyi - I get my sequin waste HERE)  I love sequin waste and use it all the time.
Here's the background page:
   I got a magazine in the mail today and saw an ad with those ribbon flowers (do you all look through magazines thinking "I could use that in an art project!"?  sometimes the ads catch my attention more than the rest of the magazine).  Right away I was trying to think what to do with those and thought the bright colors would be great on that green background.  So while watching the Artistic Bikers Thursday Ustream from the fabulous Oasis Studio I fussy cut the flowers.  And Blade was talking about summertime and things that represent summer so I thought summertime would be the perfect title for this page.  I've been wanting to see how ledger paper would feed through my printer so once I got the text how I wanted it I printed a page out of an old ledger book I got off ebay for 99 cents awhile back.  Worked out great and I'm really happy with the page.
You can get links to The Artistic Biker Ustream and YouTube from his blog HERE.

And if you want to see more stencil art,  check out a page I did a little while ago - Click Here
This page was definately Paula inspired with the many layers added to it!

Thanks Paula and Blade for all the inspiration I get from both of you!

If you read all the way through to here I applaud you.  If not, I understand, it got pretty long.  Hope you enjoyed the pictures!

Thursday, May 26, 2011

Seven and Seventeen

Doesn't everyone eventually draw pears in their art journal?  Well, I just did.  Here's my pears drawn and painted with Derwent Inktense Pencils:

I've said it before but worth saying again - I LOVE Inktense Pencils.  The colors are so vivid!  They also now have Inktense Blocks.  I don't have any of those yet but they look like they would be lots of fun.
I rubber stamped on tissue paper and glued it down with matte medium.  I use Daniel Smith Matte Medium for gluing down lightweight paper items.  I then glued down some postage stamps with a pear image.  I did that to help tie in this page to it's facing page where I did a Pear collage.  Here it is:
    I did the background with several layers of craft acrylic paints and gesso.  Both pages were started off with a layer of gesso so the medium I applied wouldn't sink into the paper.  I used some punchinella (sequin waste) to add some dots interest to the background.  I stamped the pear/poire stamp (Stampers Anonymous) on tissue paper and glued them down with matte medium.  I stamped the sketched pear stamp (Art Impressions) 3 times on decoative paper and cut them out and glued down.  Then added the three postage stamps with pear image to the lower left corner.  Collage didn't look done..needed something on the top left.  I was walking by the buffet and there's a bowl of tickets my niece use to play with and noticed some that seemed the right color of yellow so grabbed them.  Glued them down and softened the edges with an inkpad and stencil brush and called it done!
This was a good exercise for me as I pretty much never use yellow.  Green - all the time but not much yellow.  Always good to use a color you don't usually use.  Helps me to appreciate the color more.  Also, always good to try to draw something...practice makes perfect, right?  Not that I want to be perfect but hopefully keep improving!
Thanks for taking a look!
Enjoy Memorial Day Weekend!

Tuesday, May 10, 2011

Color Wash, Gesso, and Stencils

I am enamored with spray colors in my journal!  I'm having fun with a couple dif kinds but I have to say Adirondack Color Washes by Ranger are my favorite.  The colors and the way they react with Gesso just make them way TOO COOL!
I've learned so very much about art journaling from my friend Paula, aka Journal Artista. Check out her blog HERE.   Not only will you see some great journaling but you'll find links to her YouTube and UStream videos where you can find a wealth of info on art supplies, techniques, and art journaling.
One of the key things I've learned from Journal Artista is about layering.  I'm nowhere near as fearless as Paula when it comes to layering but I'm working on it!
Here's a journal page I made using many layers of Gesso and Color Wash:
I used Wild Plum and Stream Color Wash.  And I was using White Gesso made by Daler and Rowney.  The stencil I was using is a Tattered Angels stencil - from their Ironworks package of stencils.  
I started off this journal page with a layer of Gesso on the page.  Next I just played around with spraying over the stencil with Wild Plum and Stream Colpr Washes, and Gesso.  The cool thing about Color Wash and Gesso is that when  you paint Gesso over anything with Color Wash the Color Wash bleeds through.  My final layer with the stencil was where I sponged Gesso over the stencil in an area where I had got a little heavy handed with the Wild Plum and it was really dark.  Be sure to either let each layer dry or dry with a heat gun if you want the colors to not blend together.  
Along the left side I  painted a vertical stripe of Gesso and while still wet rubbed with baby wipe to blend some of both colors of Color Wash.  I couldn't stamp over it as Color Wash would bleed through the Gesso and the stamped letters would be hard to see.. So I used some Grungeboard letters from a Tim Holtz idea-ology pack called "Mixed Minis" for the word COURAGE.  The little key and the two florishes are from that same Grungeboard pack.  Painted them all white with Gesso and glued them down.  Hit it with a few light sprays of the Color Wash so Grungeboard pieces aren't so stark white.  
You might need to click on the picture to enlarge if you want to see it, but, I hand wrote "Courage is KEY" as that is what I was thinking about as I made this page.
Thanks for taking a look!
Hope you are all having a creative week!  
What I want to try next is Tim Holtz Distress Stains.  Looks like one could get some cool backgrounds with those.  I don't have any yet but I noticed they are on sale at one of my favorite online stamp companies - Red Lead Paperworks.  Check out the sale HERE.  Soon as I have some spending money I'll be heading there!   

Monday, November 22, 2010

NaNoJouMo

I've been a little lax about scanning lately. I started a new job last week and put in 40 pretty intense hours of training at the computer so didn't want to put much more time in. But this weekend I got a couple pages scanned so want to share them with you.
NaNoJouMo day 19 the word was FRAY.  Since I was feeling a little frayed from a week of training I extended it out to FRAYED and the page above is what I came up with.  The background is watercolor pencils.  Then I used a piece of mesh fabric with frayed edges.  The word is on a piece of ledger paper that I first drew a bunch of lines on with a sharpie and a ruler.  Then tour it out of the ledger paper and inked the edges with a black ink pad.  Then I stamped the word "frayed" on the paper and adhered it and the mesh down with gel medium.

NaNoJouMo Day 13 the word was MYSTIQUE.  Below is the page I made inspired by that word.  I decided it should be a tribute to the ever mysterious, ever powerful Feminine Mystique.  And I wouldn't want to say anything more about it and take away from the Mystique!


The background is watercolor crayon.  I then covered the whole page with used postage stamps stuck down with gel medium.  Stuck a blue border of stamps on 3 sides with more gel medium.  Then printed the words on a piece of ledger paper and cut it out with postage stamp decorative scissors.  Edged it with teal ink and stuck it down with gel medium.  Last step was to put more stamps down on and over the edges of the ledger paper.

I'll share more as soon as I have a chance.  I want to thank Dawn again for sharing NaNoJouMo with us.  You can check what she's posted for it all month on her blog here.  Thanks for taking a look.   

Saturday, November 13, 2010

Equanimity - NaNoJouMo

Here's another page I did for NaNoJouMo.  You can find more info about it in previous posts or there is a link on the sidebar of this blog.
The prompt for this page was "Equanimity".  I had to look it up to make sure I knew what it meant.  Good thing cuz not sure I did!
I used watercolor crayons, white acrylic and a brayer for the background colors and layers.  The collaged flowers and circles are cut from decorative paper.  And various rubber stamps were used on each layer.  The words were stamped on last.
I really like how the colors turned out.

With NaNoJouMo I find that I don't journal and/or create fast enough for a daily prompt.  The goal is not to complete a page everyday but to journal everyday.  I am doing that and I will keep a list of all the words but I don't think I'll make a journal page centered around each one.  My goal with art journaling is to create no pressure art so words that don't do anything for me would be pointless for me to journal about.  That's not to say that I won't challenge myself and use words I wouldn't normally, just that I'm not going to make something using every word.  But I don't think of that as the true goal of NaNoJouMo - I think of it as a way to explore your own journaling and to get in the habit of journaling everyday and it is working wonders for me to that end.  It is so good for my heart and soul to make a point to be creative everyday - whether in a few hours stretch or even just to fit in 20 minutes on a stressful, rushed day.

My best words to offer to you - take time to do something you really, truly enjoy everyday.  Make the time!  You'll realize benefits.  Being happy isn't always a given, sometimes you have to reach for it and take it in whatever small bits you can get it, and build from there.

Library book sale at the expo center at the fairgrounds this weekend - I'm hoping to find some cool books there for inspiration and art materials for some bargain prices.
Hope you all have a great weekend!

Friday, November 12, 2010

NaNoJouMo - CHOICE

Here's another page for NaNoJouMo - Dawn DeVries Sokols' prompts for journaling everyday this month - you can find the original post here.  And be sure to check out her blog here to see lot's of link to what others are doing for NaNoJouMo and lot's of inspiration.  All the daily prompts are posted there too.


The background for the page is a rubbing from a rough surfaced picnic table.  It doesn't show real well in the photo but it shows the wood grain.  I drew squares of various colors on the background.  Stamped out the word "CHOICE" on squares of scrapbook paper.  Edged them in various colors and glued them down.  Then I printed the words for the rest of the page on a couple dif pieces of patterned vellum and attached those with brads.

Thanks for taking a look.  And be sure to check out Dawns' blog and NaNoJouMo at the links above.

Monday, November 8, 2010

NaNoJouMo - one week down

I've been participating in NaNoJouMo.  You can see the original post here.  It's Dawn DeVries Sokols' idea to give us prompts to get us journaling every day for a month and it's alot of fun!  Check out Dawns' blog http://www.dblogala.com/ to see lot's more about it and lot's of inspiration.
The first week is over.  It started Nov 1st and goes for the month.  Here's what I did for the first day:

I don't usually do anything to the first page of a journal.  Or, save it for last.  But with the start of NaNoJouMo and a word like "Inception" it just felt right.  I went all with words for this one and started with a piece of scrapbook paper.  I used ledger paper for the words and the 1.  Grunged it all up a bit with a stencil brush and ink and sequin waste and more ink.  I think it ended up looking pretty fun for a first page.

Here's another page I did.  The prompt for this day was "Fortune".  And since I'd been saving this fortune cookie fortune (aka hoarding) to use someday this seemed like the perfect time.  You can click on the picture for a bigger image but just in case you can't read it, it says "You will emerge from uncertainty into great peace and freedom.".  I've had alot of "stuff" going on in my life for a few years now and am ready to move past the uncertainty and great peace and freedom sounds wonderful - bring it on world!  

I have more pages in various stages of completion.  I'll share them as I get them scanned.  The challenge isn't to complete a page each day.  The challenge is to journal each day, whatever works for you to that end.  So think about it and check out Dawns' blog - it's never to late to start.  Just Begin Where You Are!
Have a great week everyone!

Friday, October 29, 2010

willowing.ning.com - Art, Heart & Healing

I've been taking part in the FREE class Tam is offering at willowing.ning.com called Art, Heart & Healing.
Tam is a wonderful person, I just love her! She is so easy to learn from! And a true joy to watch!


Years ago, someone told me I couldn't draw. I think I can pretty much trace it back to a really traumatic experience with a substitue art teacher in 8th grade. Fortunately for me, Tam came along and didn't bother to tell me if I could draw or not. She just showed me how! I have never (or probably not since that 8th grade art class) seriously tried to draw a portrait. But I have to say for a first effort I am really happy with this portrait drawing! I used what watercolor crayons and pencils I had on hand, and not being into drawing people didn't have alot of "skin tones" so I'm not real thrilled with the coloring. Except I do love the hair color! (used my current fav Inktense Pencils for the hair) And I am thrilled with how the overall journal spread turned out. I love Tam's technique for painting and background.

Here's a closer look at the face:  (click on either picture to see a larger image)

Like I mentioned the class is FREE. So head on over HERE and check it out! She might just help you learn something about yourself and in addition to creating some great art you might create a happier you! That, of course, is up to YOU! Enjoy!

Saturday, October 23, 2010

The Spooky Gallery Journal Page

Ths week the challenge on Ky's blog The Gesso-Dragon is "Spooky" and in honor of this time of year she challenges us to make a journal page honoring something we like about it.  You can check out the challenge and the blog here.
I love Halloween and have alot of Halloween stamps I really like so decided to make a gallery page using a variety of those.  The background is craft acrylics.  The pieces are on a variety of card stock and watercolor paper.  I stamped and cut out images and framed them.  Drew the spider webs on and stamped the spiders as well as some of the gallery attendes in white ink.

The Spooky Gallery banner was attached with silver skull brads - love these!  The words "The Spooky Gallery" were printed out from a Word document on cardstock.  The background was colored with watercolor pencils and water was dripped down the page for the subtle black drips.

The larger skulls at the bottom of the banner are clay masks made by a local artist.  Oh wait, that was my imagination running away with me, actually I cut them out of scrapbook paper.  But wouldn't they be cool clay masks?
Spooooooooky, huh?
This page was alot of fun to make and it was alot of fun to get all my Halloween stamps out and look through them.  I got alot more...may have to do another Halloween project!
Thanks Ky for hosting the challenge!