Saturday, December 31, 2011

Postcard Challenge 2012

DarcyW, a UK artist, has posted a really great challenge on her blog for 2012.  You can read all about it HERE.
I need a few good challenges for 2012.  And it is one postcard a week.  Surely I can manage one postcard a week.
And the swap is inspired by Nick Bantocks Grffin and Sabine series of books.  I love those books!
I just about have my characters figured out.  Just need to come up with a few more details.
And will finish binding my book in the next couple days.

Here's the start of my book:
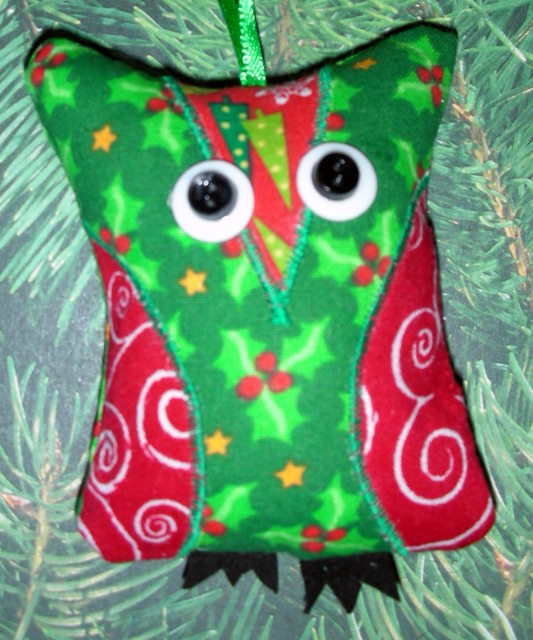
Front cover

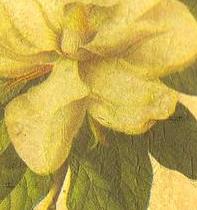
Inside front cover - I'll insert a written note outlining my characters here
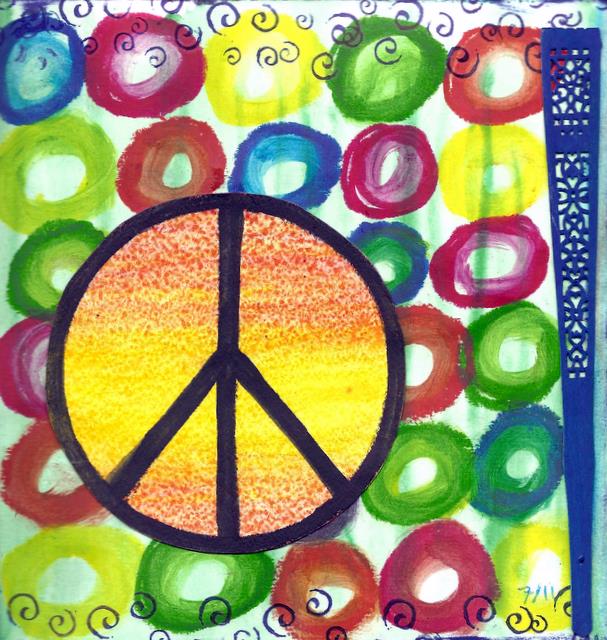
One of the inside pages - with flap I'll slip postcard into each week
The book is 7' by 7".  The front cover and inside front cover flap are bits of paper overlayed with black tulle and then stitched in place.  The postcard flaps are all cardstock covered with maps and deco paper stitched in place.  (yes, I did zig zag stitch around 52 flaps - go ahead, call me insane!  lol).  I got the coptic stitch binding for single pages idea, as well as the idea for using the tulle, from watching my creative friend, Barb, on UStream.  You can find her channel HERE.

I'll be back to post my finished book and talk about my characters soon.  And hope to have a year of postcards to share here.

Thanks to Darcy for such an inspired idea!!!

HAPPY NEW YEAR EVERYONE!!!

Sunday, December 25, 2011

Sunday, December 18, 2011

Eiffel Tower

I currently love everything Eiffel Tower.  Not sure why, I have no great desire to travel to Paris (but I would NOT turn down a chance to go!).  And no plans anytime soon.  But I am intrigued by the image and it catches my eye wherever it is.
I got this fun stamp set that feeds my love of the Eiffel Tower and has alot of possibilities for creating stuff with an Eiffel Tower theme.  Here's what the stamp set looks like -
 And here the tag set I made using some of them -
Below is the 3 separate pieces before I tied them together with 3 strands of ribbon. 
The largest tag is a kraft tag, the middle is a manilla tag, and the smallest is a strip cut from a 12x12 sheet of scrapbook paper that has Eiffel Tower postoids on it.  You can see I also used one of the postoids from that same paper on each of the other tags.  I sprayed all the tags with my very favorite spray, Lindy's Stamp Gang Starburst Saxifrage Olive Copper - you can find it HERE.  Then stamped the images with VersaFine ink.  I added some charms I had to the little strip of postoids (the Eiffel Tower charm I had was the exact same size as the image on the paper - how cool is that!).
I'm really happy with how it turned out!
Now I need to get a couple more Christmas things made so I can play some more with this stamp set!
Hope you all are having a creative weekend!
Happy Holidays!

Friday, December 9, 2011

It's Beginning to Look Alot Like Christmas

Continuing on with quick projects, I've got out Christmas supplies and have been playing around with making tags.  All different sizes, based on 6x6 paper pad and what size scraps I had.

Here's some of the tags I have so far -
All of the rubber stamps used are from a set by Prima called North Country.  You can see it by clicking HERE.  Some of the papers are from the 6x6 collection of papers from the same North Country collection by Prima.  Other papers were stuff I had on hand from other years (I have alot of "stuff".  LOVE my STUFF!).  The die cuts are various die cuts I found on Ebay already cut out.  I don't have any Christmas dies (yet) so had to spend a few dollars to get some stuff from people that do have holiday dies.

It's alot of fun having all kinds of Christmas stuff out and putting together tags.  Now I need to go put some fibers and ribbons on these and see about decorating some envelopes.  If I have your snail mail address you might end up with one of these in your mail box!

Thanks for taking a look!
Have yourself a creative weekend!

Happy Holidays!

Thursday, December 8, 2011

Bee Sweet or Be Square

Here's my silly cat, Maui, keeping me company while I art by using the empty box I set on the chair next to me:

She's a lot of help!  lol

Friday, December 2, 2011

Time is a Gift

I've been making small art projects lately.  Mostly postcards and tags. 
Here's a postcard I finished a couple days ago. 

The images are cut out of magazines and glued to a heavy cardstock base.
The letters were printed out on cardstock ans then punched out with circle punches and glued down.
I used Tacky Glue for all the glueing.

Thanks for taking a look!
Have a creative weekend! 


Monday, November 21, 2011

California Dreamin'


I have a friend that is currently living in Ohio due to family obligations.  But is dreaming and planning for the day she can return to Sunny California, preferably San Diego.
In honor of her birthday earlier this month I made her a Folder Tag Holder full of California themed tags (as inspired by my art friend and mentor, Dede - you can see the kits she sells to make these yourself on her Etsy HERE).
I didn't get a chance to take pics of the folder before I mailed it off but I did manage to scan the tags so shared them with you here.
When I first thought of the idea I went on Google and searched for California and San Diego Travel Guides and went to the websites and ordered the free paper copies.  When they got here I went through and tore or cut out many images.  I covered the outside of the book with California maps.  Then gathered a bunch of dyed tags and some watercolor paper scraps and started sewing on images.  I've been having so much fun sewing on paper lately!
I'll get Debbie to take some pics of the Folder Holder for me and share those with you another time.  But wanted to share these with you in case you are in need of some warm sunny thoughts and/or some California Dreamin'!
Thanks for taking a look!
Hope you all have a creative week!

Saturday, November 19, 2011

Owl Ornaments for sale on ETSY

You can now find my Owl Ornaments for sale on ETSY by clicking HERE.
Thanks for taking a look and I really appreciate any purchases,

Also while over at ETSY check out the great stuff my friend, Debbie, has listed.  You can find her ETSY by clicking HERE.  She is one of the most creative people I know and has some great ornaments, charms, really awsome hand dyed ribbons, and more.  Including these these great Altered Matchboxes:

Have a great weekend everyone!


Thursday, November 17, 2011

It's Raining Owls!

Purple and Green owls
Musical Owls
  Blue Owls

And an assortment of Owls decked out in their finest Christmas attire!

I've been sewing and sewing owls and plan to list them on my Etsy.  I'll let you know here and via Twitter when I get them listed.
The owls are all the same size.  They are approx 3 1/4" tall and 3 " wide at the ears.
They are alot of fun to make.  I swear when I glue the eyes on they each develop their own personality!

Thanks for taking a look!
Hope you have a creative day!

Monday, November 7, 2011

Sewing Postcards

I've had my sewing machine out to make some fabric Christmas ornaments - I'll share those here when I get finishing touches on them.

I decided as long as I had the machine set up I would play around with sewing on paper so made some postcards.  Here are a few of them:


I used a combination of magazine images, fabric and stamped quotes.  I had a great time playing with the sewing machine and the zig zag stitch!
If I have your address, you never know, one of these might show up in your mailbox!
Hope everyone has a creative week!
Thanks for taking a look!

Monday, October 31, 2011

Happy Halloween!

Oh, this is post # 100!  Spooooooookkkyyy!  lol

Saturday, October 29, 2011

Lilies

Here's my latest journal page:

The background is sprayed with a homemade spray I made with reinkers.  All the pieces are glued down with matte medium (I used Daniel Smith brand, you can\find it here) .  The very back paper is some round ephemera pieces I have, I cut it half and glue the pieces down, then adhered the lilies magazine image I had fussy cut.  The leaf is an actual leaf I had dried between the pages of a book.  "LILIES" is hand written with a Sharpie® pen on a scrap of watercolor paper I painted Lime Green.  And the text is hand stamped (a Printworks rubber stamp).  How appropriate as what has a more wonderful fragrance than Lovely Lilies?!?
Thanks for taking a look!
I hope you are having a CREATIVE weekend!

Wednesday, October 26, 2011

Magnolia Journal page

Magnolias are one of my favorite flowers.  Awhile back I got a card from a friend that she had made with a magnolia she had put on the front.  A day or two later I got a card from another friend and she had used a Magnolia postage stamp to send it.  Then while out and about I had gone to an antique store that had a painting of a magnolia very similar to the one on the card that had a black background.  A journal page inspiration/idea started building in my head!
Heres' what I came up with:
I painted the background with layers of gesso, black acrylic, and dark green acrylic.  Then I used a Tattered Angels mask for the fence and used a makeup sponge to sponge two shades of green acrylic.  I used another mask and two shades of green again for the mask in the upper left corner.
I toned down the white on the postage stamp with green ink and also, edged the magnolia image I had torn off the card with the same green ink.  The page needed one more thing, I looked through a bunch of magazines and found the center image.  Everything was glued down with matte medium.  The magnolia from the card got a sort of cool texture, almost crackled.  Here's a close-up you can sorta see the texture:
  Cool, huh?
Here's a close-up of the masking also:
I really like how it turned out with the two shades of green.


Thanks for taking a look!
Enjoy the rest of your week!

Monday, October 24, 2011

Ok, I'm ready for the REWARD!

Here's a journal page I made based on a fortune cookie fortune "Your path will be difficult but will be rewarding".
When I got the fortune my first thought was that it would be great for a journal page.  I've had it sitting on my art table for awhile.  While looking through ALL the stuff I'm saving for collage and trying to organize it I came across this winding river image I've been saving for just the right thing.  The two just seemed to go together!
The background is acrylics - maroon, white, and a drop of ultramarine blue.  They are blended and spread around with a palette knife.  I printed the words out on card stock.  I edged everything with an olive green ink pad to grunge it up a bit.  Everything was glued down and sealed with acrylic matte medium.
I put and extra REWARDING at the bottom for good measure.
Bring on the rewarding part!
Thanks for taking a look!
Now - go do something creative!

Friday, October 21, 2011

My Poor Neglected Blog & Postcards

I have been seriously neglecting my blog for over a month now. 
In part because my camera is not working, in part because I've been doing more organizing and consolidating my art stuffs (or atleast trying to) than creating, and partly just being lazy!
I have a couple journal pages I will scan soon.
And I've been playing around with Halloween tags and a few bookmarks I hope to share with you soon.

In the meantime, here's a couple postcards I finished yesterday and today:
 I painted a piece of watercolor paper green to start this pc.  Then sprayed it with Wild Plum Color Wash for the splots.  Then cut up some scraps of decorated paper I had from last year and glued them down.  Then punched some skull and crossbones out of same paper and glued them down.  Also glued down some Halloween confetti.  Last thing I did was edge the whole postcard with Black India Ink (my fav black ink pad).

This one is watercolor paper I colored orange with Inktense Pencils.  Then edged with Black India Ink.  And stamped the quote with same ink.  Then glued the image from a Just For Fun rubber stamp that I had stamped on a seperate piece of paper that had a watercolor background.

Hope you enjoyed taking a look at them and I'll try to post art here regularly!
Thanks for taking a look!
Now go do something creative!


Sunday, September 11, 2011

A Day To Remember 9-11-01

A day that changed the world...


In honor of all affected by that day, my mom, my niece and I made the following envelopes as part of 
the Remember September Mail Art Memorial Project.  You can read all about it by clicking HERE.
Above is the one my mom, Myrna, created.


Above is the one my niece Piper, who is 11, created.


And, above is my decorated envelope.

My friend Debbie, is the one who originally told me about this mail art project.  She participates each year and you can see her envelope for this year on her blog by clicking HERE.

Thanks for taking a look at my blog.

Saturday, September 10, 2011

Remember September

For several years I've participated in a Remember September Mail Art Memorial.  Last year my mom, Myrna, and my niece, Piper, contributed art also for a three generation participation.  Here's what we sent last year:

Above is Piper's, below is my mom's, and then mine.
My mom and I are going to Piper's for pizza with her folks and brother's later today.  We are going to make another set of three generations of Remember September Mail Art.
Pictures to follow in my next post.
Since September 11th falls on Sunday this year you can mail an envelope today or Monday.
So, there is still time to take part.
You can see lot's of great mail art as well as learn all about the project HERE

Tuesday, September 6, 2011

Check this out for a chance to win Pan Pastels

Well, I'm back online at home so have internet access without having to go to the library.  They are going to miss me at the library!  lol

Check out this post on Lin's Yours Artfully blog for a chance to win some Pan Pastels.  It's a great opportunity to try out something new.  Give it a try - you may be the lucky winner!  I know I'm hoping I will be!

Good luck to us all!


Friday, August 12, 2011

fyi - no internet access

Just to let you know I won't have internet access for the next few weeks. 

I'll try to check in here or my email a couple times at the library or on someone else's computer.

And I'll be back to regular programming (lol) next month!

Now if I can just remember what my email password is!

Later,
Kimber 

Sunday, August 7, 2011

30 days of Get Your Art On

I took part in Traci Bunkers 30 Days Of Get Your Art On.  You can check out her blog HERE.
I did good on the art part, but the posting art, not so much.  At one point I was getting all stressed about how behind I was and finally figured out how that was working against me.  The point was to spend time making art each day and I was doing it for me.  So I gave up on worrying about scanning or photographing and posting.
I really got into the habit of making art every day.  Made me remember how much I like to do art.  It's my comfort zone.  Makes me happy.  And we all need all of the "do things that make me happy" thing, right?
I like doing art, I like thinking about the art I did before I go to sleep at night, and I like waking up in the morning and going into the art room to look at what I did yesterday.  And Getting My Art On everyday gives me a chance at all those.  So I thank Traci for getting me on track with that.  And hope that any time in the future I get slack about being creative I challenge myself to another 30 days to get the habit back!
Here's a few journal pages I did during my 30 days:
This was done with craft acrylics, dye inks, stencils, punchinella, and rubber stamps.  The circles were stamped with bottle lids.  The word were printed on ledger paper and cut out and glued down with acrylic matte medium.
This background is craft acrylic paint and then punchinella and pigment ink over that.  The owl was drawn with Inktense Pencils.  The whites of the eye were done with white watercolor crayon.  The owl was outlined with a black water-based Sharpie paint marker.
This was done on a watercolor wash green background.  I wanted to play with some new Crayola Slick Sticks .  They are so creamy and smooth and colors blend very nice.  I used them for the circle background.  I used a rubber stamp and black dye ink for top and bottom borders.  The Peace sign was something I had leftover from another project.  It's a watercolor background and lines are drawn with a Sharpie. The blue along the right edge is a piece from a wooden fan that was coming apart.  It was natural wood color but I colored it with the blue Crayola slick stick and glued it down.  Page looks kinda groovy, huh?

I have alot more to share, several projects are for swaps and I don't want to spoil the surprise for anyone by showing them yet.  A few others I need to scan or photograph (I'm really bad about getting around to that!)

Thanks again to Traci Bunkers for inspiring me to Get My Art On!!!

Hope you are all having a creative weekend!